Pages

Sunday, 30 June 2013

Chard and Ricotta "Ravioli" with Sage Butter Sauce


I need to start making my own pasta soon (the ex used to take care of that chore, and did it well) - in the meantime, I had some leftover dumpling wrappers which work well enough in a pinch.   The title of the recipe refers to chard; in fact, I used a combination of swiss chard and beet greens.  Spinach would work just as well.


The butter sauce is very rich (obviously, it's nothing but butter!) so this is really meant to be eaten as an appetizer in small amounts - 3-5 ravioli per person at most. This recipe makes 15-20 ravioli.  The sauce makes more than enough for this amount and can probably be cut in half; but better to have it and not need it ...

Ingredients:
1 cup finely chopped greens (swiss chard/beet greens/spinach)
1/2 container ricotta (about 1 cup)
1/8 tsp freshly grated nutmeg
S&P
Dumpling wrappers
1/2 cup unsalted butter
6 large Sage leaves, plus additional chopped sage for garnish
1 lemon
Parmesan cheese

Combine greens with ricotta.  Grate in the nutmeg, then add S&P to taste.  Ricotta is quite bland, so you'll need some salt, but add a bit at a time so as not to over-salt.  Drop a spoonful of filling onto one dumpling wrapper.  Keep a bowl of water nearby to wet the edge of each dumpling.  Then place the second wrapper over top and press so edges adhere.  Be careful to ensure edges are stuck together otherwise the filling will leak out when boiled.


Bring a pot of salted water to a boil, then reduce to a steady simmer (this will help to avoid them splitting apart).  The ravioli should take 8-12 minutes.  Don't overload the pot too much. Prepare sauce in the meantime.


In a shallow pan, heat the butter on medium-high until it begins to foam.  Allow the foam to subside and do not allow butter to burn.  When beginning to brown, remove from heat.  Add whole sage leaves, which will sizzle in the heat.  After a minute or so, the butter will cool a bit - at this point, squeeze in the juice of 1 lemon.


When ravioli is ready, gently scoop into the sauce and lightly toss to coat.  Serve with parmesan cheese, and chopped sage leaves.


Saturday, 29 June 2013

Rosemary and Cheddar Biscuit Bites


I have a confession to make.  I have a slight obsession with Red Lobster biscuits.  As a non-seafood-eating vegetarian (you know, the real kind) for many years in the past, I agreed (on many occasions) to go to Red Lobster with my crab-loving friend just so I could eat those biscuits.

This recipe is not intended to be a copy; in fact, there is no garlic in these, and the RL biscuits are definitely garlicky.  However, these are similar enough to satisfy my cravings.  And I'm quite sure that the addition of a clove or two of garlic would make these even better; I just hadn't thought of it at the time.  These are super easy to make.  I use lots of rosemary - why bother using a herb if you can't taste it?

Makes about 30, but depends on the size.


Mix in a large bowl:
2 cups flour
2 tsp baking power
2 tsp kosher salt

Cut in 2/3 cup cold butter.

Lightly stir in:
3 Tbsp sour cream
1/2 cup old cheddar, grated
1/2 cup parmesan cheese, grated
3 Tbsp fresh rosemary, finely chopped
2 Tbsp thinly sliced green onion or chives
1/2 tsp ground black pepper


Pull the dough together forming a ball - add 3-6 Tbsp of milk to help the dough adhere.  Place in the fridge for about 30 minutes.

Line a baking sheet with parchment paper.  Drop 1-2 Tbsp of dough onto the sheet (I pressed the dough down a bit to form a rough biscuit shape).  Bake at 400 degrees F for about 15 minutes or until golden brown.

Friday, 28 June 2013

Zucchini and Mushroom Pasta with Garlic-Buttered Bread Crumbs


I love growing summer squash as it is a serious ego-booster for gardeners.  Zucchini generally grows fast and furious for even the beginner gardener.  I have about 10 plants on the go from a mystery pack of mixed summer squash seeds.  So far I've seen evidence of green and yellow zucchini, and I also see eight-ball squash, as well as both yellow and green patty pans (these seriously need to be monitored closely).  There are still a few mysteries remaining.

In the meantime, I am so paranoid about getting overrun with zucchini that I'm picking them as "babies".  Very tasty and tender, but I think I'm being a bit silly, and will try to let the next few grow bigger.  Delicious either way, I just don't want them to get too big as the texture becomes a bit woody (dried out) and bitter in flavour.  So I've picked as many teeny-weeny zucchini (nice!) as I could to make this dish.


As a side note, it would appear that the hay bale "garden" containing two summer squash plants (one green zucchini, the other eight-ball) is slowly collapsing under the weight.  Assuming I do these again next year, I'll have to be careful about what I plant in the hay bales.


And I have only recently realized the extreme difference between Russian and French Tarragon.  I am growing Russian Tarragon.   French Tarragon has a much stronger anise-flavour which is what I am usually looking for when using this herb.  So I'll be on the lookout for some in the coming weeks.

The addition of the garlic-buttered bread crumbs is more of a luxury than a necessity, but zucchini can get pretty soft (hopefully not mushy) when cooked so it's nice to have a bit of crunch.  This recipe serves 4.

Ingredients:
Garlic-Butter Bread Crumbs (recipe below)
Olive oil
1 lb spaghetti
1 lb zucchini, sliced
1 lb mushrooms, sliced
2 cloves garlic, minced
2 Tbsp tarragon, roughly chopped
2-3 Tbsp veggie/chicken stock or heavy cream
S&P
Parmesan cheese

Once the bread crumbs are prepared, start the salted pasta water.  The rest of the ingredients should take about the same time as it takes to cook the pasta.

Heat a large pan and add 2 Tbsp olive oil.  Add mushrooms, stirring only when needed (I'm personally a terrible "stirrer"- but best to leave them alone as much as possible to get nice and brown).  Only add salt after mushrooms have released their water.  Once mushrooms are lightly browned, add zucchini. If you happen to be drinking some white wine, add a splash or two.  Cook until zucchini is softened.

Add garlic and tarragon.  When pasta is ready, quickly add stock or cream to the mushroom/zucchini mixture, then add pasta.  Season to taste - great with lots of pepper.  I used veggie stock just because I was in the mood for something a bit lighter, but cream, as you can well imagine, is another luxury for this dish.

I always use tongs to bring pasta from its pot to the pan so that the pasta water is readily available if additional liquid is required.  Toss ingredients together.  When serving, top with garlic-buttered bread crumbs and parmesan cheese.


Bread Crumbs:
1 Tbsp olive oil
1 1/2 Tbsp butter
1 cup panko bread crumbs
1 garlic clove, minced


I always have panko bread crumbs on hand, although it's nice to make your own bread crumbs from dried-out bread.  If using panko, just remember that it is already seasoned and may not require as much salt.

Heat oil and butter in a pan on medium-high heat.  The butter will start to foam; once foam starts to reside, add garlic, then 30 seconds later, add bread crumbs.  Stir until bread crumbs are toasted and golden-brown in colour.  Season to taste, then set aside.

I often make extra bread crumbs as there are so many uses: macaroni and cheese or other pasta dishes, veggie casseroles, shrimp, baked fish .. yummy!


Thursday, 27 June 2013

Beet Green Salad with a Maple-Balsamic Dressing


This salad "recipe" (I know, it's just a salad) is taken from the Union Street Kitchen Witch blog.  Jenny Osburn, the owner of the Union Street Cafe in Berwick, Nova Scotia is a friend of a friend.  I have never had the opportunity to meet Jenny, but had the pleasure of eating many of her mom Anna's Slippery Jack pickles (and rummaging through her bookshop, oh so awesome!).

The recipe combines so many of my favourite tastes: thinly sliced red onions, feta cheese, nuts, dried fruit and fresh greens!

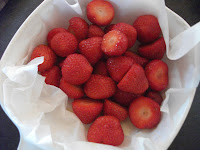
The original recipe (A Really Delicious Swiss Chard Salad) is perfect as it is, but naturally, I've had to adjust based on ingredients.  My greenhouse beet greens are far superior to my swiss chard at present, so I don't really have a choice.  And as much as I prefer raspberries to strawberries, I can't bring myself to buy them when I have bowls of strawberries that need to be used.  Having said that, I can't think of too many things as spectacular as the vibrant red of a freshly picked, ripe strawberry against the backdrop of garden greens.


So the recipe below is adjusted for those ingredients, otherwise exactly as shown on Jenny's blog.

Salad:
2-3 bunches of beet greens, washed and cut into ribbons
1/2 cup crumbled Feta
1/4 cup chopped Almonds
1/2 cup slivered Red Onion
A big handful of Strawberries
1/4 cup dried Cranberries


Top the beet greens with the feta, almonds, red onion, strawberries and dried cranberries.  Drizzle with dressing just before serving and toss gently.

Dressing:
1/4 cup Maple Syrup
1/4 cup Olive Oil
1/4 cup Balsamic Vinegar
1 teaspoon Salt
2 teaspoons Dijon Mustard
1 clove Garlic, minced
1/4 teaspoon Pepper
Combine all ingredients in a lidded jar and shake to mix.


Nice beet greens

Nice swiss chard, but too small

First batch of swiss chard: pathetic!


Tuesday, 25 June 2013

Free-form Balsamic-Strawberry Cheesecake with Milk's "Liquid Cheesecake" Base


Have I mentioned already how much I love cheesecake?  Very much like lovers of raw cookie dough, I intentionally leave a few spoonfuls (spoons-full?) in the bowl of that delicious gooey batter.  When I first received the Momofuku Milk Bar cookbook as a gift, I was excited to check out recipes from a baker (Christina Tosi) that could impress David Chang the way Chang's Momofuku cuisine had impressed me (OK well, impressing David Chang is a much bigger deal than impressing me, but you know what I mean).  I did not realize I would discover someone whose love of cheesecake batter would not only rival mine, but actually gross me out a bit (you'll have to read for yourself about her childhood obsession with Jell-O No-Bake Cheesecake).

I am using Tosi's signature cheesecake recipe, "Liquid Cheesecake" to make my own informal version of a strawberry cheesecake.  I have left out the cornstarch and simplified the technique, but otherwise followed the recipe directly.   The liquid cheesecake is spooned over broken butter cookies and topped with balsamic-roasted strawberries (just add a Tbsp or two of balsamic vinegar with some strawberries and bake at 400 F for 30-40 minutes to add a deep, rich flavour to the berries).


If the cheesecake mixture is made ahead of time, it should be slightly re-warmed (microwave) before putting this together.  Crumble some butter cookies and put some at the bottom of the serving cup.  Add some of the cheesecake mixture, then top with balsamic-roasted strawberries and some additional butter cookie pieces.


Liquid Cheesecake Recipe


8 oz cream cheese
3/4 cup white sugar
1/2 tsp kosher salt
2 Tbsp milk
1 egg


Cream the sugar with the cream cheese.  Whisk separately the egg, milk and salt.  Stream in the egg slurry and blend until mixture is smooth.

Pour cheesecake into a 6x6 inch baking pan lined with parchment paper, bake for 15 minutes at 300 degrees F.  Cheesecake should be firm-ish around the edges and loose in the middle.  If too jiggly, bake another 5 or 10.

According to Tosi, if the batter begins to rise more than a 1/4 inch or begins to brown, remove immediately from heat.  Cool completely.  The mixture should then be spreadable, smearable, or otherwise gooey for various uses.  Store in container for up to 1 week in fridge (if it lasts that long!).


Yummy!


Monday, 24 June 2013

Avocado Barley Risotto


This is recipe #2 for my health-minded friend who wants to eat avocados but doesn't like the texture.  Normally I would use arborio rice for this type of risotto but I wanted to give it an extra health kick with the barley.  I love it!  The technique for making risotto makes a creamy dish anyway, and the avocado just adds to the creaminess.

I served it with some sugar snap peas from my garden (I could only scrounge a handful of minis) and shrimp.  I think it would work equally well as a side with lamb or prime rib.

Ingredients:

Olive oil
1/2 cup of minced red onion (I whizzed it in the food processor)
2/3 cup pearl barley
2 limes
1/4 cup white wine
3-4 cups veggie or chicken stock, warmed
2 avocado
3 garlic cloves, minced
Parmesan cheese
S&P

This follows the regular risotto technique of adding the liquid slowly to absorb.  It's more important when using arborio rice as the slow cooking allows the rice to release its starches and get good and creamy.   But even for barley, which is not starchy (or not as starchy as rice anyway), this technique seems to make the dish creamier compared to boiling the barley and tossing it all together.

Keep the stock on low heat.

In a large pan, add about 1-2 Tbsp olive oil, and saute the minced onion.  After 5-8 minutes when it has softened, add the barley and stir for 1-2 minutes.  Squeeze in the juice of 1/2 a lime.  Add the wine.  Stir again, and allow the wine to be absorbed (some will also just evaporate).  Add a pinch of salt.

Add a 1/2 cup of stock at a time, allowing the barley to absorb the liquid before adding more (don't let it fully dry out, just mostly absorbed).  Continue to add about 2 1/2 cups at which point it should be at least "al dente".

In the meantime, mash the avocado with the garlic and juice from the remaining 1 1/2 limes and a pinch of salt.

When the barley is "al dente", stir in the mashed avocado mixture.  Give a taste and adjust seasoning as needed - you'll likely need more salt than expected, but this tastes great with lots of pepper as well.  Continue to add liquid in smaller increments until it reaches a creamy texture.

Add some grated parmesan at this point based on your taste, or add cheese when serving.  Garnish with sliced green onions and finely diced tomatoes.  Serves 2 as a main or 4-6 as a side dish.

The shrimp and snap peas were sauteed with butter, garlic and a pinch of salt.

Sunday, 23 June 2013

Mulch Mulch Mulch

Sugar Pumpkin

It is that time when mulching is most appropriate.  Too soon in the season and there is a risk of covering up seeds that have not yet sprouted, or damaging tender seedlings.  But too late and weeds will most certainly over-run the garden.  Now don't get me wrong, there are plenty of weeds already, and particularly so for me as I'm quite lazy in this aspect.

But there are other benefits to mulch other than weed suppression, including holding in moisture, and, depending on the type of mulch, it can also add beneficial nutrients to the soil.

Blueberry Bush
I am experimenting with different options this year, and rarely will one solution suit all.  For example, I am using pine straw around the newly planted blueberry and raspberry bushes as fruit likes acidic soil.  In fact, many plants like acidic soil so my few acres of pine trees offer plentiful mulch for years to come (although it's apparently a myth that pine needles still retain any acidic qualities by the time they dry out).


And I was given some wood chips by a friend which I have used between the raised garden beds.  I will need a lot more to cover the areas that I want and am considering renting a wood chipper at some point (this will help to clean up fallen limbs from the winter and I can use wood chip mulch almost anywhere).


Various Squash
Earlier this year, I bought some hay bales for the intent of hay bale gardening.  I knew I wanted to use some as mulch as well, so I bought extra.  Hay (versus straw) can often contain weeds, so it comes at a risk.   But it is cheap (really cheap in my opinion:  see Bargain Gardening Supplies Post) and looks nice.  It also breaks down well over the winter - actually, I have not seen any weeds popping out of the hay as yet (other than the odd fungi), so maybe that becomes more problematic after it breaks down into the soil.


Potatoes get an extra benefit from this mulch - they can actually grow in hay.  The containers in the greenhouse holding potatoes had a layer of hay at the bottom.  The potatoes in the outside garden have hay on top.  It will help to keep the sun away from any potatoes that grow close to the surface.


The small plants in the front are fingerlings planted later


Another experiment is sheep fleece as mulch.  From what I have read, I understood that sheep wool no longer demands the same premium that it used to, and farmers often have to burn the wool when it can't be sold (it requires a lot of cleaning and preparation to be sold as a fiber for manufacturing clothes).  A friend of mine knows Fred Baker, sheep producer extraordinaire from nearby Mountain, Ontario, so she hooked me up with him to get some wool.  Although it was not free, the price was worth the great dinner and an evening chatting with Fred who seems to know everything about everything (and now I have a great contact for getting some lamb meat).


I've used the fleece around the recently planted plum trees.  I had seen this at a friend of my brother's who runs a small sheep farm in Mission BC.  He used old wool around the base of some trees.  I did not ask at the time what it was for, but it seems to me it might help frost conditions over the winter and early spring, and also to keep animals from nibbling on the tender bark of the young trees.


The rest of the fleece went on the newly planted pumpkin/melon patch.  I thought it best to use fleece on vegetables with a thick skin so that it does not stick to the vegetable when harvesting.

Cantaloupe


The original pumpkin patch was covered with hay.


Most mulches behave basically the same, so I suspect it will mainly come down to aesthetics.  I am used to the look of hay, and I think it looks nice once it has been wet down once or twice and settles in.  I am not used to seeing the big white blotch of fleece in the middle of the yard, nor am I used to the mild stench (I have read reports of wool mulch attracting fox - I am more concerned about my neighbour's dog!).

So in the long run, it will simply come down to my own preference, with cost (free?) being most important, and simplicity and looks following close behind.


Saturday, 22 June 2013

Successes and Failures in the Greenhouse: Late June


Well, here are two obvious comparisons to start with.  On the left, a cucumber from one of these healthy Salad Bush Hybrid Cucumber plants.


And on the right in the main picture is that pathetic little sugar pumpkin that I thought I had successfully pollinated a week or so ago (Pumpkins and Melons post).  I have not yet given up on this pumpkin plant that I am attempting to grow in a container.  But maybe it was not a failed pollination that caused this to drop off?  If anyone is aware of other possible causes, please fill me in.  This happened last year at the farm in a regular garden as well so I don't think it's specific to container gardening.


Other successes:

I grew Okra for the first time last year, and although I managed to grow enough Okra to toss into the odd stew or casserole, I certainly never saw the plant flower.  So this is something special for me!


Potatoes flowers have mostly come and gone in the greenhouse, although they are just flowering in the yard. I have thought about digging into one of these containers for some baby potatoes but I'll wait another week or two.  In fact, I'm waiting for the green beans, which have not yet flowered so I can have a nice nicoise salad (baby potatoes, beans, tuna, yummy).


Isabel Pole Beans

 And the Taunus beets also seem to be doing well, at least for the beet greens.  And there is some evidence of beetroot as well.


And I have no worries with the tomatoes:


As for failures:

I'm not thrilled with the Swiss Chard I am trying to grow in pots; these were started from seed in late April and should be much larger than they are.  Perhaps their growth is stunted by a too small container.


And these beets and carrots were planted in the styrofoam containers in mid-April.  They are still growing and seem OK, but carrots and beets planted much later in larger containers are much further along, so I suspect these containers are just too small.


Overall, the greenhouse seems successful so far, and I look forward to continuing harvests!


Friday, 21 June 2013

Jamie Oliver's Beautiful Zucchini Carbonara (but lighter)


Zucchini can be beautiful, but only early in the season when it has not yet overwhelmed the gardener!  I have been keeping a close eye on this one, my first of the season.  In fact, I was so excited, I picked it so early that I did not even have enough for this recipe.  I am far too aware of how fast zucchini can get out of hand, so I picked it as soon as it looked useable.


I do not normally eat pasta with creamy sauces. They taste great but I often don't feel well afterwards. I would imagine that carbonara is pretty high on the list of "heart attack on a plate" dishes.  With all of Jamie Oliver's attempts to get people to eat healthier, I just assumed that his carbonara recipe would be lighter fare.  Not so.  The addition of zucchini helps ... a bit.  Because I did not have enough zucchini, I also tossed in some baby spinach. 

But what made it not so heavy eating this time around is a simple mistake I made while preparing the recipe.  I was particularly inattentive when I made this and rather than using egg yolks only, I used whole eggs.  After tossing the pasta together, I was surprised at the amount of sauce ... I thought, my god, how gluttonous, there is enough sauce here for twice as many servings! 

As a result of my error, I discovered a recipe that makes a lighter than usual carbonara dish, but still delicious.  By halving the amount of cream and cheese and using the whole egg instead of just the yolks, you end up with about the same amount of sauce, but much lighter.  I also reduced the amount of bacon from 3 slices per serving to 2.  But one minor note on the cheese ... when Jamie Oliver's recipe refers to a "handful" of parmesan, I chose to assume he meant a manhand-ful. :)


This is based on the recipe from the Jamie At Home cookbook and should be enough for two large servings, or three for us regular folks.

Thyme
Ingredients:

6 slices bacon, chopped into chunky pieces (remove any big chunks of fat)
2 medium zucchini, halved lengthwise then sliced
2 cups baby spinach leaves
Spaghetti for 3
2 large eggs
1/4 cup heavy cream
1 large "handful" parmesan cheese, grated
2 Tbsp fresh thyme
S&P


In a bowl, mix together the two eggs, cream and half the parmesan cheese. 

In a large frying pan (you will eventually toss all of the pasta in this pan), fry the bacon until crisp.  Add zucchini and fry until browned.  Season with some salt to taste, and lots of cracked black pepper.  Add thyme and stir.

Timing is of the essence at this point.  When the pasta is ready, use tongs to add it to the frying pan, along with a bit of the cooking water (if you use tongs, that means you don't have to drain the pasta, and keep the cooking water in the pot in case more is needed).  Give it a quick mix, then REMOVE FROM HEAT.
 

Now pour in the egg mixture and quickly toss to avoid scrambling the eggs.  Sprinkle in the rest of the parmesan and add more cooking water if you want a thinner consistency.  Adjust seasoning and serve while it's hot!

And a final note on thyme.  Remember when I complained about growing rosemary (Growing Herbs From Seed ... Not)?  Same issue with the thyme.  The thyme on the left was purchased for $2, and the thyme on the right was painstakingly grown from seed in February.  Ugh!