Saturday 30 November 2013

Homemade Whole Wheat Crackers


I recently picked up some locally milled wheat flour at Watson's Mill in Manotick.  What a difference it makes to have fresh flour instead of what I usually use ... that stuff in the grocery store that's probably been around a year or two.


These crackers are easy to make and both tastier and more nutritious than anything I can buy at the store.  This recipe makes about 30 3-inch crackers.

Ingredients:
2 cups whole wheat flour
1/2 tsp kosher salt
3 tsp baking powder
1/4 olive oil
2/3 cup water

Blend together flour, salt and baking powder in a bowl.  Add olive oil and mix in.  Drizzle in the water and stir just until combined.

Knead on a flour surface briefly until somewhat smooth.

Separate into 4 pieces.  Cover with a towel and let rest about 15 minutes.  Then use a pasta roller or a rolling pan (I used the rolling pin) to roll the crackers as thin as you'd like - I tried to go about 1/8 inch thick, but probably was a bit thicker.  Cut rounds with a cookie cutter, or just cut pieces with a pizza cutter or knife.  I used a cookie cutter, but then cooked some of the leftover pieces in various shapes as well.

Sprinkle with kosher salt.  Bake at 350 degrees F for about 25 minutes until crisp and browned.  Check regularly in the last few minutes to ensure they don't burn!


Here I've served them with some treats purchased recently at a local craft fair: a raw cow's milk cheese made in Elgin Ontario (Bushgarden Farmstead Cheese) and a pepper jelly that is possibly the spiciest I've ever eaten (Kawalsa Strawberry Habanero Salsa).


Friday 29 November 2013

Hot Artichoke and Crab Dip (with optional wonton-wrapper cups)


Wintery days require comfort food; specifically in the form of an appetizer.  There are a million versions of crab dip, so this is my take on it.  I love artichokes and goat cheese and they combine well with the sweet taste of crab meat.

This recipe can be served in wonton-wrapper cups (technique below) or served in dishes for dipping (fills 4 x 3.5 inch ramekins to give each guest their own dip or make it in one medium sized casserole dish).

Ingredients:
120 gram can crab meat
340 ml jar marinated artichoke hearts, drained
6 oz cream cheese
4 oz goat cheese
2 Tbsp sour cream
1 tsp dry mustard
2 Tbsp green onions, sliced
2 Tbsp lemon juice
2-3 Tbsp grated aged cheddar


Chop artichoke hearts.  Mix together all ingredients except the grated cheddar.  Transfer to ramekins or a medium casserole dish.  Top with grated cheddar.   Bake at 375 degrees F until mixture is bubbly and browned on top.

Serve immediately with tortilla chips or baked / toasted pita bread.

If serving in wonton-wrapper cups, bake as described, then let the filling cool to room temperature.


Wonton-wrapper Cups

Coat each wonton wrapper with a spray cooking oil on both sides - very little is required.  Place them in muffin tins and bake at 350 degrees F for 7-10 minutes until crisp.  Add in your filling then bake again for about 10 minutes to heat through.  During the second baking, you may need to cover with tinfoil to keep the tips of the wrappers from burning.


Wednesday 27 November 2013

Grilled Lamb Sandwiches with Goat Cheese, Caramelized Onions and Tomato Jam


Well, there isn't much to this recipe other than what is already indicated in the title.  I used leftover lamb from the Rosemary-Garlic Roast Leg of Lamb to make mini sandwiches.  Little sammies.  Little lamb-y sammies. Yummy little lamb-y sammies.  Hmmm, sorry.  Here's the lamb I was using:


For the caramelized onions, I always prefer red onions.  For one large onion, add about 2 Tbsp olive oil and 1 Tbsp butter into a pan.  Add thin onion slices and stir to coat them fully with the oil/butter mixture.  Then cook low and slow.  If they start getting dry, add a splash of wine, beer or just water if that's all you have around.  It takes 20-30 minutes, stirring often to ensure they don't stick.  They are done when you want them to be ... but better the longer they cook.

If you don't have tomato jam, make it (here's my recipe).  Or you can just use tomato chutney or another type of chutney. 

Then it's just a matter of putting it together:  (1) Bun/Bread, (2) Goat Cheese, (3) Tomato Jam, (4) Thinly Sliced Roasted Lamb and (5) Caramelized Onions.  Enjoy!


Tuesday 26 November 2013

Stuffed Spaghetti Squash (Part 2) with Roasted Peppers, Herbs, Olives and Goat Cheese


I'm still loving the spaghetti squash. In fact, I've removed some of the seeds to save for the garden next year.  I think they should grow properly (unlike tomatoes which really need to come from an heirloom variety).  If anyone thinks these won't work, let me know and I'll chuck them.  Otherwise, I hope to be growing some of my own spaghetti squash next season.

Here is a another tasty way to serve this squash.  The "Part 1" recipe (spaghetti squash with pesto and shrimp) involves removing the strands of "spaghetti" and tossing them with other ingredients.  This version is a stuffed variety but there are still spaghetti-like strands when eating.


This is one of those "throw whatever you have in the fridge together" type of situations where you can add in any of your favourite veggies.  I went with one of my favourite combos of red onion, black olives, roasted peppers and goat cheese in a tomato sauce.  But next time maybe sundried tomatoes and artichoke hearts.  Or feta cheese or even ricotta instead of the goat cheese.  Spinach?  Mmmm, wish I'd thought of that earlier.


Bake the squash as usual: cut in half, remove seeds, bake cut face down on a baking tray at 350 degrees F for about 30 minutes.  

In the meantime, prepare your filling.  Saute together in a small amount of olive oil:

1/2 red onion, sliced
2-3 Tbsp roasted red peppers, chopped
Pitted and sliced black olives

Add 1 1/2 cups whole tomatoes or tomato sauce, along with some leaves of fresh thyme or rosemary.  Cook about 10 minutes together.  Remove from heat and allow to cool slightly.  Add about 4-6 oz goat cheese, then season to taste.

When squash is ready, place cut side up on baking tray.  Ladle filling into both sides of the squash.  Top with additional cheese (grated parmesan, cheddar or mozzarella).  And I had some garlic-butter panko crumbs in the freezer so I threw some on top as well.  Bake again just enough to heat through the filling and brown the cheese on top (maybe 10-15 minutes at 400 degrees F).

Sunday 24 November 2013

Soggy Feet: Step 3 - The Solution


This is part three of my posts about dealing with the wet areas of my property.  Due to low lying ground, a good chunk of the north end is very soggy in the spring and right into June.  Ugh.  Then the little lakes start forming again in the fall depending on the rains.  Ugh again.  The picture above was taken in July; a nice dry month (and before the greenhouse disaster)!

My first post on this topic explained my disappointment in realizing that I would not be able to plant any of the planned perennials (fruit bushes, asparagus, rhubarb) in that area as their roots would get (and stay) far too damp in the spring.

This was the worst spot in April (just behind where the greenhouse is in the picture above):


Here are my pumpkin seedlings in May on the edge of that same area (I was able to successfully transplant some after another heavy rain, but several died):


The second post explored various options including raised gardens, annual-only plantings and a few other methods for making use of the space.

Although this is titled "The Solution" it is by no means final.  The transformation of the property into what I want it to be will likely take many years.  It will take a while partly due to effort and dollars - I can only do so much each year.  But it is also because my vision will change often; hopefully I won't ever stop dreaming of new ideas and so I expect it will be an ongoing project for years to come.

But ... what have I done so far to address the watery trouble?  Nothing in terms of drainage, that's for sure.  It's all low ground around here, so not sure how to drain it away without spending lots of bucks??  If anyone has suggestions, I'm all ears.


In the meantime, I have done the following:

1) Built Raised Gardens (right side of photo above and one of them pictured to the right): This allows me to get plants started in May and early June without worrying about drenching their roots (or over-soaking the seeds).

2) Hay Bale Gardening (see the big zucchini plants on the left side of the picture above?):  Again, this gets things up off the ground a bit.

3) Vertical Gardening (far right in the back in the picture above):  Well, my first attempt wasn't super successful but I've got the concept right and just need to work out some bugs.

4) Hugel Garden (picture to the right): Because the base of the garden is logs and other yard debris, this is another type of "raised garden".  At least for the first year or so until everything starts to break down.

And where that soggy pumpkin plant was in May?  A few feet away on a slightly higher spot, I've dug another new garden:


As for the options I was researching in the second post, there are two that I have not covered off.  One was "storage" - if I can't use the space, I might as well store stuff there.  Well, I had a big load of dirt stored in one area, but I managed to use almost all of it for new gardens. 

And hardy perennials that are suited for that type of wet soil?  Still working on that.  I did save some seeds from milkweed plants growing in an equally wet area elsewhere on the property.  Has anyone tried growing milkweed from seeds??   Your advice would be appreciated.  Otherwise, I'll keep working on this option.

After yesterday's snowfall (as light as it was), the season is definitely over for me here, but I'll have plenty of fun over the winter thinking of new garden designs and layouts.

In fact, I have a good idea of what I want it to look like.  Just like "Sue's Garden Journal" blog pics - see this link for a pretty awesome setup.  I'm very envious ...


Saturday 23 November 2013

Celery Soup


Next growing season, I am definitely going  to try sticking the root end of a bunch of celery into the ground to get it to grow.  My mom did it this year and ended up with this (seems a lot easier than starting from a little seedling).  Very cool!


Somehow I ended up with way too much celery in the fridge and this is an easy and tasty way to use it up.  It can even be a bit limp; no concerns about texture here.

I had intended to use some buttermilk in the recipe but it came out creamy enough and I forgot all about it.  It does not need to be strained, but it makes it a little more velvety smooth than just whizzing it with a blender.

The parmesan rind is optional.  You know when you get near the end of a piece of parmesan cheese and it's too small to grate but you don't want to waste it?  Drop it into a pot of soup and the cheese will melt off then just pull the rind out at the end.


Ingredients:
1 thick slice pancetta, diced
1 1/2 cups onion, chopped
4 cups celery, chopped
2-3 cups stock
Celery salt
3-4 cups spinach and arugula and parsley
Lemon juice
Parmesan rind (optional)


Heat a medium sized pot and add the pancetta. When cooked partway, use a paper towel or other method to remove some of the fat, leaving just enough to saute the onions.  Add the onions and saute until softened, about 7-8 minutes (and the pancetta should be crisp by then).

Add the celery and 2 cups of stock.  Cook until celery is tender.

Season with some celery salt for taste.  Add the greens and cook for another few minutes.


Strain through a sieve and return soup to pot.  Bring back to a simmer then add the juice of 1 lemon.  If you prefer a thinner consistency, add more stock (or some buttermilk) and cook another few minutes.

Serve with a crostini dropped in the bottom of the bowl topped with blue cheese (the blue cheese is just as delicious with this soup as with the broccoli soup I made a while back).


Thursday 21 November 2013

Last Harvest - Brussels Sprouts and Purple Haze Carrots


This is definitely the last harvest of the season.  These little brussels sprouts and carrots were picked a few days ago. The carrots were grown in a container in the greenhouse.  Although I planted them way back in June, I did not bother to thin them out. 


And as I've mentioned before, I need some advice on how to properly grow brussels sprouts; they don't seem to have enough time to mature.  The brussels sprouts in the picture are on a towel because they still had bits of snow from the recent spell of cold weather.

I used my final harvest to make a shredded carrot and brussels sprouts salad (dressed with yogurt, lemon, honey).  It was only so-so and I won't bother to share the recipe.


Wednesday 20 November 2013

Fattoush Salad


I used to go to a quasi-Lebanese restaurant in Ottawa called the Brookfield most Thursdays for lunch.  Why Thursday you ask?  It was the only day each week when they made Fattoush Salad (bread salad).  And I loved it!  Nowadays I pop by the Brookfield for breakfast now and then; I'll have to see if they still make this salad.

In the meantime, here is my home version.  There are many variations on the dressing, but the key ingredient in any Fattoush Salad is ground sumac.  This spice is made by grinding the dried fruits (referred to as drupes) of certain types of sumac trees - I am guessing these are the same kind of trees that I used to have at my old place; ugh, they grow like weeds!  Anyway, the spice tastes a bit sour-lemony.  And another common lebanese ingredient found in the dressing is pomegranate molasses.  But this is optional if you don't have any on hand.

This serves 4-6 as a side salad.


The Dressing:

I found many similar recipes so I used one from this website for the dressing.  This is the recipe as shown but I reduced the amount of olive oil.  I don't really understand the purpose of soaking the ground sumac; some recipes called for that technique but many did not.  I recommend doubling this recipe if you are making enough salad for 4-6 servings.

2 tsp ground sumac, soaked in 2 tsp warm water
2 Tbsp fresh lemon juice (I used a wee bit more, just had one juicy lemon)
1 Tbsp pomegranate molasses (optional, I used half of this)
1 garlic clove, crushed (I minced it)
1/4 cup extra virgin olive oil (I used a bit less)
Kosher salt

Put all ingredients into a small mason jar and shake together.  Set aside.


The Bread:
Some versions did not include toasting the bread first.  But usually "bread salads" are a way of using up stale bread so that being the case, toasting would not be required.  I had fresh pita bread, so I baked it for a crunchier texture.


Drizzle olive oil onto two pieces of pita.  Sprinkle with sumac and kosher salt.  Rub it in to ensure the pita are evenly covered.  Bake at 350 degrees F until crisp and browned.


The Salad:
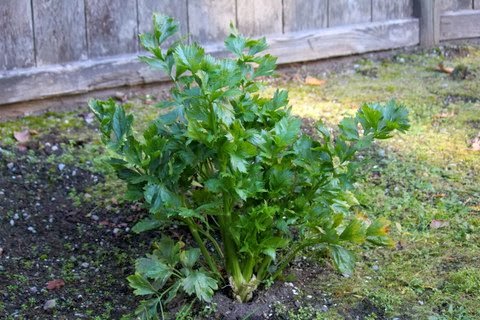
Well, this can be just about anything you want, but lebanese cuisine often uses a lot of parsley, so don't forget that!  Here is what I used:

1 large bunch romaine lettuce, torn into bite-size pieces
1/2 field cucumber, diced
Cherry tomatoes, halved
1 red onion, thinly sliced
1/4 cup parsley, chopped (I really prefer flat-leaf but couldn't find any so curly works OK)
1/4 cup mint, chopped


Combine salad ingredients in a large bowl.  Break up the pita into pieces and crumble over salad, toss with dressing.

Although I intentionally baked the pita to crisp it a bit, I actually like to add the dressing a few minutes before eating to let it get a teeny bit soggy.   It's just better that way ...


Monday 18 November 2013

Garlic and Rosemary Roasted Leg of Lamb with Lemon Roasted Fingerling Potatoes


If I had eaten this earlier in life, I may never have become a vegetarian.  Well, maybe not.  It was more of morality thing at the time, but my mind may never have wandered there in the first place had I eaten one or two juicy, tender lamb roasts in my early years.  Luckily, I came to my senses and now get to enjoy a great meal like this now and then.  But I still avoid commercially mass-produced meats.  Seriously, it is all tasteless anyway ... why not eat meat a little less often, spend a few extra bucks and get something you will really enjoy?  Good for you and the community!

Ingredients:
3 lb bone-in leg of lamb
olive oil
fresh rosemary
6-7 garlic cloves
lemons
oregano
1 lb baby fingerling potatoes

Remove the lamb from the fridge and place in a roasting pan (I don't have a roasting pan so I used a casserole dish).


In a food processor, combine garlic, 1/2 tsp dried oregano and a handful (2 Tbsp) of rosemary leaves.  Give it a whiz to break it down a bit, then add 2-3 Tbsp olive oil and the juice of 1 lemon.  Process again.  It should be a bit looser than a paste but not too liquidy.  Spread over lamb, mostly on the top, but get a bit on the sides as well.  Let rest for about an hour.


Preheat the oven to 375 degrees F.


These are some of the fingerling potatoes from my recent harvest.  They only take a few minutes so prepare at any time.  Scrub clean but leave skins on.  Toss with a drizzle of olive oil, the juice of 1 or 2 lemons, 1/2 tsp of oregano and S&P.  Use more lemon as needed, you want lots of lemon juice!  Place the potatoes around and under the lamb (and insert meat thermometer if you have one).

I like meat on the rare side; after only 1 hour I removed it from the oven (128 on the meat thermometer).  I read somewhere that it should be about 30 minutes per pound for medium-rare, but that obviously depends on the shape, the amount of bone and the temperature of the oven.

Let the roast rest for at least 10-15 minutes before slicing.

Sunday 17 November 2013

Spaghetti Squash (Part 1) with Shrimp and Pesto

This could have used some chopped chives or parsley for colour!  Ooh, or red pepper flakes!

Spaghetti squash really can be used to replace spaghetti, but let's be real, it doesn't taste the same.  But yes, it generally goes well with many of the same sauces as you would have with spaghetti ... with a tomato-based sauce or maybe a creamy mushroom sauce.  My favourite way to eat spaghetti squash (although I would never eat real spaghetti this way) is just tossed with butter and parmesan cheese; an elegant side dish to most meats or fish.

Here it is combined with pesto and shrimp.  You may also want to add some garlic, but that will depend on the type of pesto you are using and if it already has enough garlic.  Jarred pesto is pretty good usually or make your own (try one of my pesto recipes: Traditional Basil Pesto; Garlic Scape Pesto or Sundried Tomato and Pumpkin Seed Pesto).

Cut squash in half lengthwise, remove seeds.  Place cut side down on a baking tray and bake at 350 degrees F for about 30 minutes until tender.


Peel 4-5 black tiger shrimp per person (serves 2 or 3).  Saute shrimp in equal amounts of olive oil and butter until pink.  While shrimp cooks, use a fork to pull the flesh of the squash into strands.


Toss the squash "spaghetti" in the pan with the shrimp and add enough pesto to coat.  Season to taste and add parmesan cheese as desired.


Friday 15 November 2013

Seared Scallops with Brussels Sprouts and Pancetta


This was actually from a week or two ago, not long before a real cold snap; much more than just a heavy frost.  Luckily, I had harvested the few brussels sprouts that were ready.  Not many, but great eating these straight from the garden.


I had a friend over and wanted to try this dish out.  We were discussing our favourite way of eating brussels sprouts: mine is to cut them in half, place cut side down in a hot pan with olive oil and butter to caramelize then add some stock and cook until tender.  She said she takes them apart leaf by leaf before cooking; that is the best way to ensure they are evenly cooked.  I have to agree.

The bottom layer of the stack is some of that delicious fennel and potato gratin dish I posted a while back (but it's not super obvious from the pictures, you can just see a bit of white poking out).  I could make that every week and not get tired of it!  But it's not necessary for the dish; I was just looking for a bit more substance after a long day of ... well, just hanging out, I guess!  Oh yeah, and a little bit of yard work after the nasty windstorm blew apart my greenhouse.

Serves 2 as an appetizer or more of a small meal with the gratin added in.

Ingredients:
3-4 large sea scallops
1 round of thickly cut pancetta, diced
3 cups brussels sprouts, root removed and leaves separated
Fennel and potato gratin (optional) - see recipe here

Saute the diced pancetta in a hot pan for a few minutes to render some of the fat.  Then toss in the leaves of the brussels sprouts.  Continue to saute on medium high heat, stirring occasionally.  In only a few minutes the leaves will turn a brighter green.  Continue cooking another minute or two and the leaves will start to brown and caramelize.  Remove to a bowl and set aside.


Season the scallops on top and bottom with salt and pepper. Bring the same pan back to medium high heat; add olive oil if needed (but there may still be fat left from the pancetta).  Sear the scallops on both sides for just a minute or so (scallops can be served quite rare).


On each plate, start with a layer of the fennel-potato on a plate, add some of the brussels sprouts/pancetta mixture next, then top with a seared scallop.  Serve immediately.